Need the best budget travel tripod without adding a heavy, awkward object to your luggage? The honest answer is that the right model depends on one hard limit: are you carrying a phone, a small mirrorless camera, or a full-frame body with a long lens?
A $20 phone tripod and a $400 camera tripod solve different problems. I compared current listed prices, folded sizes, weights, heights and load ratings, then separated the genuinely useful bargains from tripods that only look good on a product page. This is not financial advice; it is a camera-gear comparison based on listed specifications and practical travel trade-offs.
What should a budget travel tripod actually do?
Stability matters more than the maximum height
A tripod exists for one basic reason: it keeps the camera still long enough to make a sharp image. That sounds obvious, but budget models often advertise a very tall maximum height while using thin leg sections and a narrow center column. The result is a tripod that reaches eye level but shakes when the wind picks up or when you touch the camera.
For travel photography, stability usually beats height. A tripod that reaches 130 to 160 cm and folds to about 40 cm is easier to pack than a studio model, yet still works for landscapes, night scenes and group photos. You can also lower the legs for a stronger stance. The center column should stay down when the camera is exposed to wind.
Check the complete camera setup, not just the body. Add the lens, battery, quick-release plate, microphone, cage and any filter holder. A camera body listed at 800g can become a 1.8kg kit very quickly. I prefer a rated payload at least twice the real setup weight, especially for cameras with long lenses.
The useful travel tripod has more than one shooting position
Low-angle legs help with foreground-heavy landscapes, city details and photos taken over a wall. A reversible or removable center column can help with close-up work, but it also adds another moving part. On a cheap tripod, extra features are only useful when they lock firmly.
Look for rubber feet, independent leg-angle locks and a quick-release plate that does not wobble. A hook under the center column is useful in bad weather because you can hang a small backpack from it, but do not swing the bag. A moving bag can make the tripod less stable instead of more stable.
My basic rule: buy the lightest tripod that can safely support your complete camera kit while reaching a practical height. Ignore inflated load numbers when the head feels loose, the legs flex under pressure or the center column is doing all the work.
Which budget travel tripod gives the best value?
Specs that matter on a real trip
These are the strongest budget and value-focused options I found. Prices are listed in US dollars from manufacturer stores or current product pages and can change with sales, stock and location.
| Tripod | Listed price | Weight | Folded size | Maximum height | Load rating |
|---|---|---|---|---|---|
| Ulanzi MT-34 | $19.95 sale | 260g | 26cm | 81.5cm | 1.5kg |
| JOBY GorillaPod 3K Kit | $69.99 | 393g | 30.5cm | Flexible-leg design | 3kg |
| K&F Concept KF09.101V1 | $80.99 | 1.24kg | 39cm | 163cm | Not stated in the listing summary |
| SmallRig AP-02 | Check current listing | 1.15kg | Compact travel format | 159cm | 8kg listed |
| Peak Design Travel Tripod Aluminum | $399.95 | Check current specification | Bottle-diameter design | Full travel-tripod height | 20lb |
The best cheap full-height option
The K&F Concept KF09.101V1 is my pick for travelers who want a conventional, full-height tripod while keeping the price near $80.99. It reaches 163cm, folds to 39cm and weighs about 1.24kg with the ball head. That combination is more useful for self-portraits and eye-level landscapes than a tiny tabletop model.
The trade-off is quality control. K&F sells many similar-looking tripods with confusing model names, and budget ball heads can develop play over time. Test the head before leaving: mount the camera, tighten the lock and press gently on the lens. If the frame shifts, the tripod is not ready for a serious night exposure.
The best sub-$70 flexible option
The JOBY GorillaPod 3K Kit costs $69.99 and weighs 393g. Its legs bend around railings, tree branches and uneven ledges, and the 3kg load rating is far above what most phones and compact cameras need. It is a strong choice for travelers who shoot from unusual positions.
It is not a normal eye-level tripod. That distinction matters. On a flat sidewalk, the GorillaPod may leave your camera close to the ground, and repeated bending can make the legs harder to position. Choose it for flexibility, not for standard portrait height.
Bottom Line: choose the K&F Concept for affordable full-height work, the JOBY for flexible mounting and the Ulanzi MT-34 for the smallest phone-first setup.
My clear pick for most budget travelers
For phone photography and light carry-on travel, the Ulanzi MT-34 is the best budget travel tripod because it costs $19.95 on the listed sale price, weighs only 260g and folds to 26cm. It is small enough to pack without making you debate the purchase every morning.
The MT-34 extends to 81.5cm, supports up to 1.5kg and includes a hidden phone clamp that accepts phones from 58mm to 98mm wide. That makes it useful for hotel-room portraits, quick group shots, walking-tour videos and short-form travel clips. Its 360-degree adjustment also gives you a simple way to switch between landscape and portrait framing.
Do not mistake it for a full camera tripod. At 81.5cm, it is too short for comfortable eye-level portraits unless you place it on a table, bench or wall. The 1.5kg load rating also leaves little room for a heavy camera and lens combination. A small mirrorless body with a compact prime lens may work, but a full-frame camera with a long zoom is a poor match.
For travelers using a small mirrorless camera, I would spend more on the SmallRig AP-02. Its listed specifications show a 1.15kg weight, 159cm maximum height and 8kg load rating. Those numbers make it a much more serious option for landscape photography, although the real test is the stiffness of the legs and the movement of the ball head.
The AP-02 is also easier to justify than the Peak Design Travel Tripod when the budget is tight. Peak Design lists its aluminum travel tripod at $399.95 and gives it a 20lb load capacity, weather-resistant construction and a compact bottle-like packed shape. It is clever and refined, but it is not a budget purchase. You pay for compact engineering, serviceability and finish.
Bottom Line: buy the Ulanzi MT-34 for a phone, the SmallRig AP-02 for a light camera kit and the Peak Design only when compact design matters more than the meaning of “budget.”
What mistakes make a cheap tripod fail?
Do you need a tripod that reaches eye level?
Buy a full-height model if you plan to take self-portraits, photograph architecture from a standing position or shoot long exposures without crouching. A tabletop tripod works for phones, hotel rooms and low viewpoints, but it will feel limiting in an open landscape.
Are you trusting the printed load rating?
Use the rating as a ceiling, not a target. A tripod rated for 8kg may not feel stable with a 2kg camera if the legs are thin and the center column is fully raised. Keep the camera centered, extend the thickest leg sections first and avoid placing a long lens on the outer edge of the head.
What should you test before flying?
- Open every leg lock and check that it closes firmly without slipping.
- Mount the camera and tighten the quick-release plate by hand.
- Turn the ball-head lock until the camera stays in position without sagging.
- Extend the center column, then lower it again to check for unwanted play.
- Fold the tripod with the head attached and measure it against your personal-item or carry-on limits.
- Walk with it packed for ten minutes. If the weight annoys you at home, you probably will not carry it across a city.
One common mistake is buying a tripod that is technically allowed in luggage but too inconvenient to use. A 1.5kg tripod may look light beside a camera bag, but it becomes noticeable after a full day of train stations and cobbled streets. The best budget choice is the one you will actually bring.
Another mistake is using a tripod on a windy overlook with the center column fully raised. Lower the camera, spread the legs wide and hang a stable weight from the hook if the design has one. Never rely on a loose backpack swinging beneath the tripod.
These small setup choices matter more than an extra 10cm of maximum height. A well-positioned $70 tripod can produce a sharper image than a badly positioned $400 model.
When should you skip a budget travel tripod?
Skip it for heavy telephoto photography
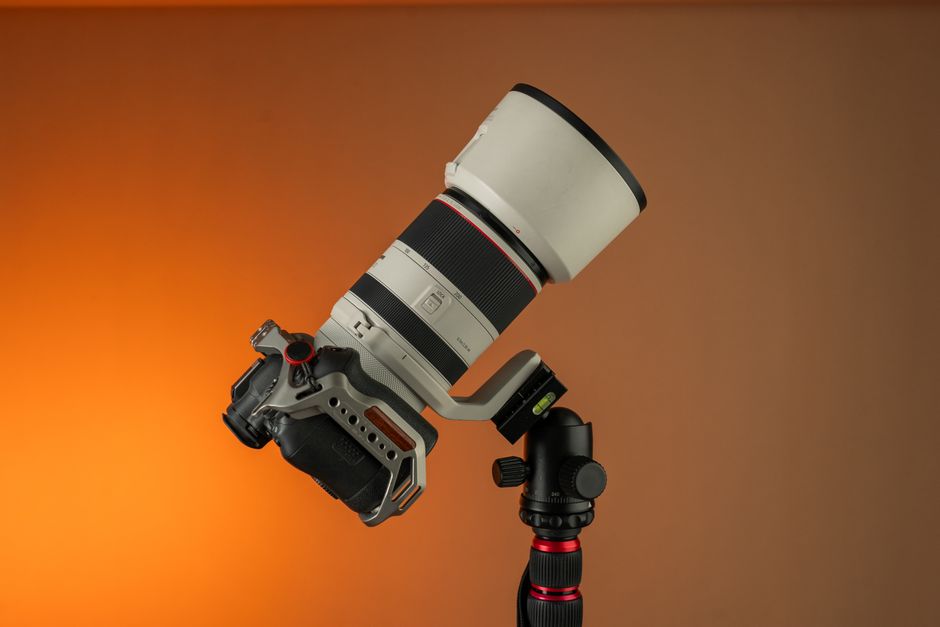
If your camera and lens weigh close to the tripod’s stated limit, a cheap travel model is the wrong tool. Long lenses magnify vibration, and a small ball head may slowly droop after you lock the camera. A heavier tripod with a larger head will cost more and weigh more, but it will give you a better chance of keeping the frame stable.
Skip it if your phone already handles night scenes
Modern phones can produce sharp handheld night photos through computational processing. If you mainly take daytime snapshots, a tripod may become unused luggage. The Ulanzi MT-34 makes sense when you need hands-free video, group portraits, long exposures or a fixed camera angle. It is not automatically useful just because it is cheap.
Consider a monopod or clamp instead
A compact monopod can be faster on crowded streets and lighter in a day bag. A clamp mount can attach a phone to a desk, railing or hotel table without spreading three legs across a narrow space. These alternatives lose some independence and stability, but they may fit the way you actually travel.
The Manfrotto Befree Advanced Aluminum is a sensible step up for photographers who want a more established full-height travel system. Manfrotto lists it at 1.49kg, 150cm maximum height, 40cm closed length and a 9kg safety payload. That is heavier than the SmallRig AP-02, but the head includes separate controls for ball tension and panoramic movement. It is closer to a serious camera support system than a casual phone tripod.
The catch is simple: the Befree Advanced is no longer a bargain if your ceiling is $100. It also takes more space and will be less appealing on a trip where you mostly use a phone. Paying more only makes sense when you need the stronger head, higher operating height and better control.
Bottom Line: do not buy a budget tripod for equipment it cannot hold comfortably, and do not buy any tripod for a travel style that never needs locked-off shots.
| Travel situation | Best choice | Why | Main compromise |
|---|---|---|---|
| Phone, hotel room and group photos | Ulanzi MT-34 | 260g, 26cm folded, $19.95 listed sale price | Only 81.5cm tall |
| Phone or compact camera on railings | JOBY GorillaPod 3K | 393g, flexible legs, 3kg capacity | Not eye-level on flat ground |
| Budget mirrorless landscape kit | K&F Concept KF09.101V1 | 163cm height, 39cm folded, about 1.24kg | Budget head may need careful testing |
| Light camera with more height | SmallRig AP-02 | 159cm height, 1.15kg, 8kg listed load | Check current price and head stiffness |
| Compact premium camera support | Peak Design Travel Tripod | 20lb capacity and bottle-like packed design | $399.95 listed price is not budget |
For most travelers, the decision is straightforward. The Ulanzi MT-34 wins on weight and price, the JOBY GorillaPod 3K wins on unusual mounting, and the K&F Concept wins when full height matters. The SmallRig AP-02 is the strongest middle ground for a light camera kit. Pick the one that matches your actual camera and the shots you plan to make, not the biggest number printed on the box.